CV simulation
Article text. --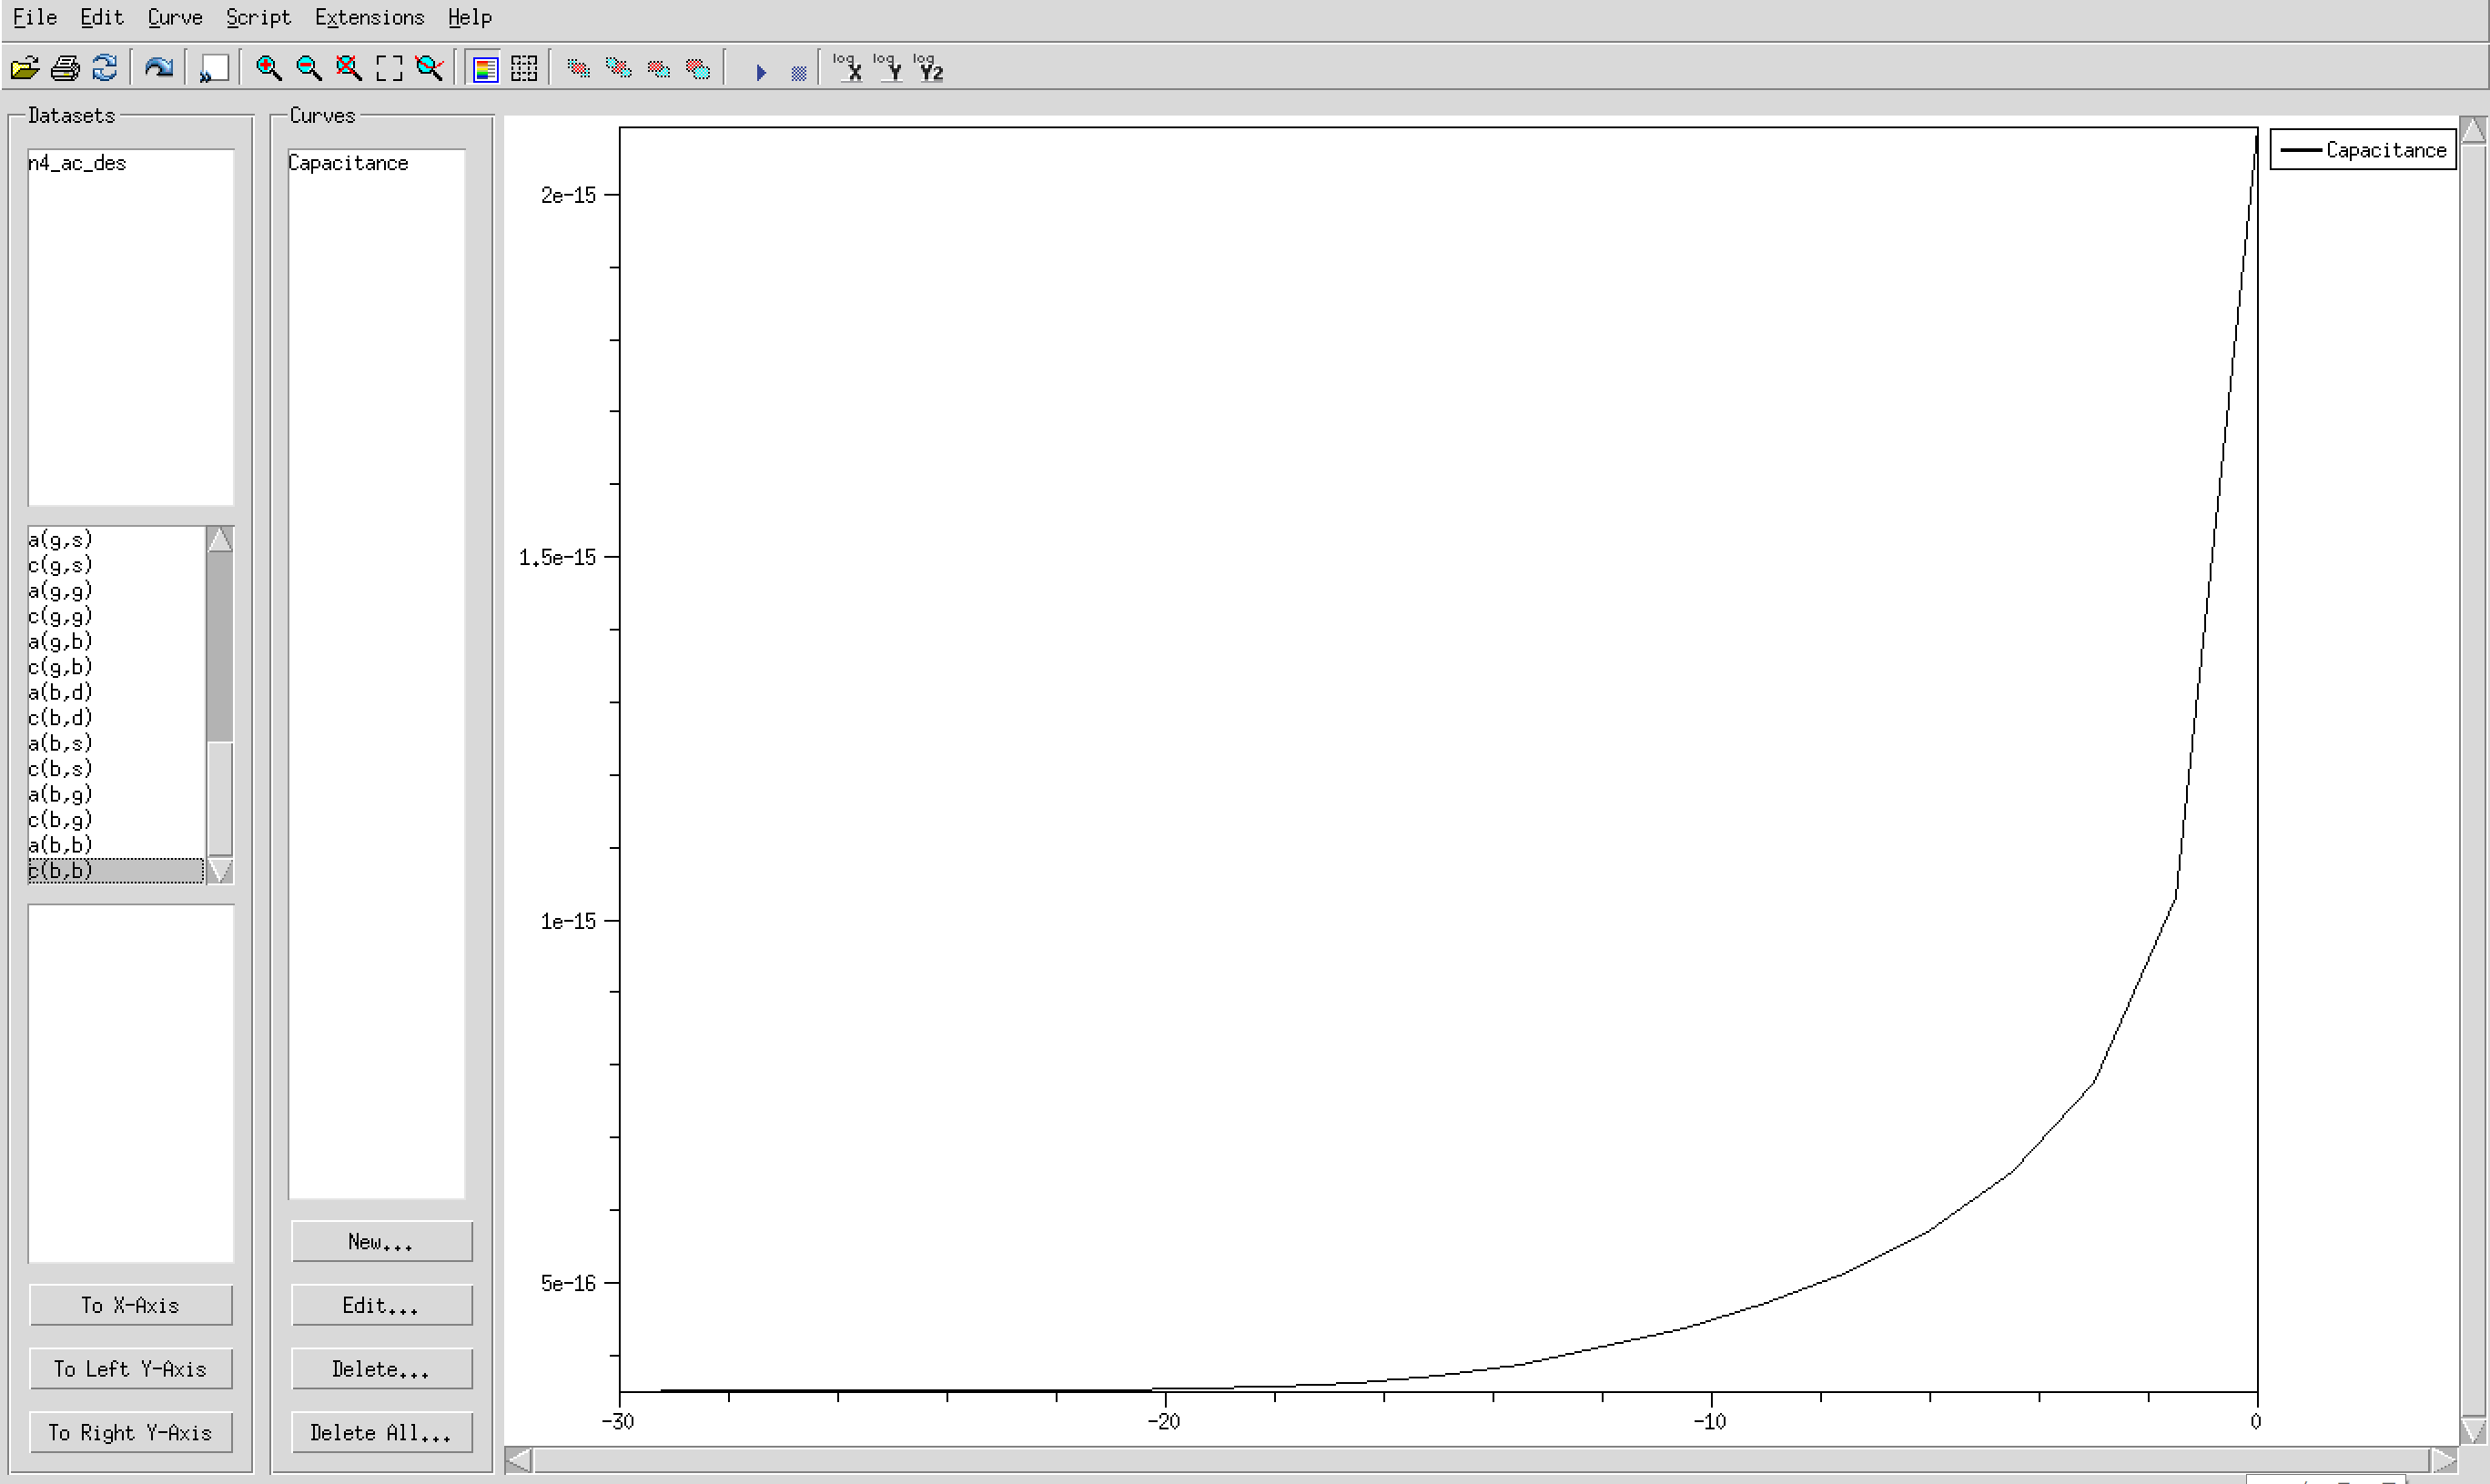 プログラム
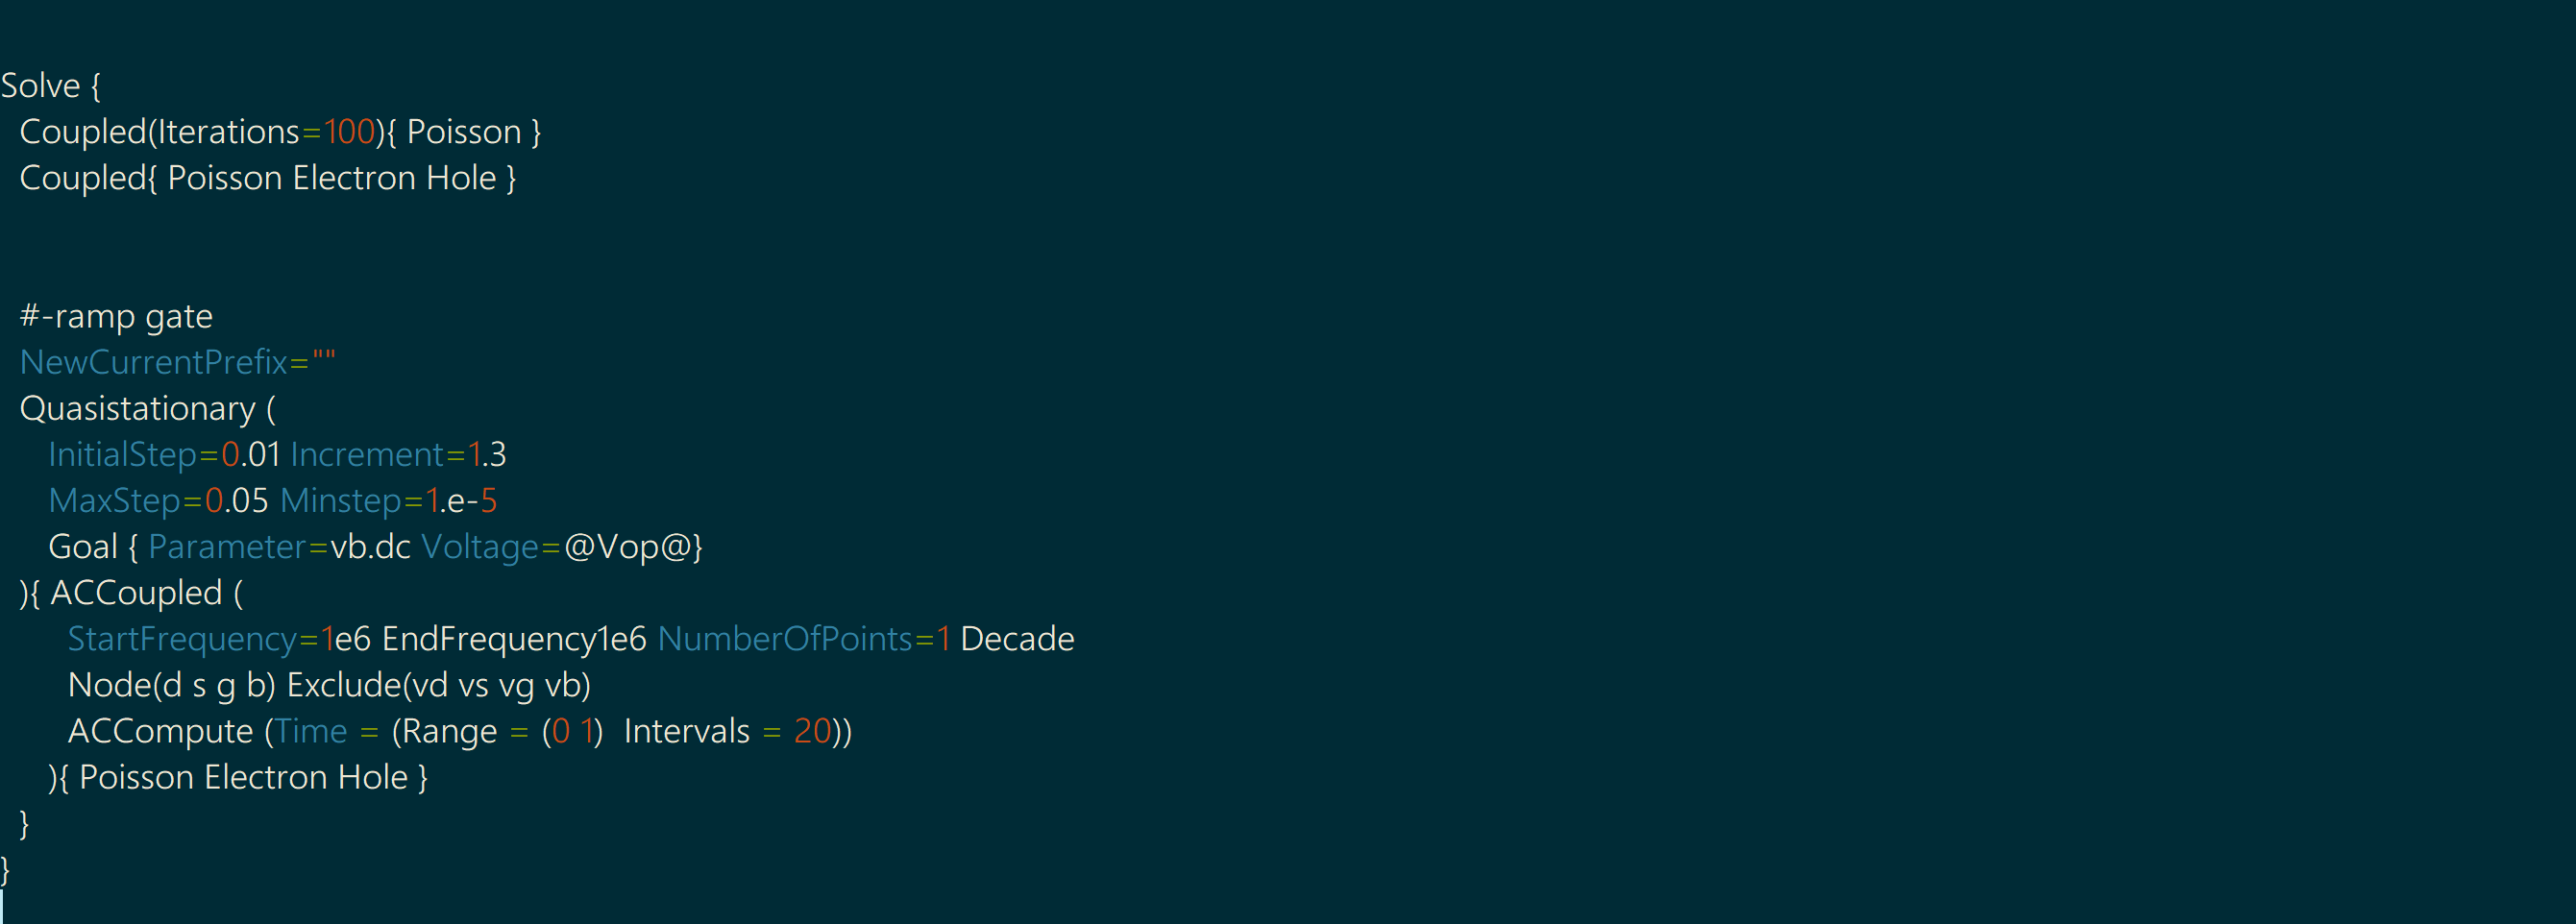
solveの中身がIVものとは異なる。
周波数の指定ができるため、行いたい点を指定。今回は一点。(1e6)
Node及びExcludeではsystemで指定した電極、及び電圧の変数を入力する。
プログラム
solveの中身がIVものとは異なる。
周波数の指定ができるため、行いたい点を指定。今回は一点。(1e6)
Node及びExcludeではsystemで指定した電極、及び電圧の変数を入力する。
Comments


| I | Attachment | History | Action | Size | Date | Who | Comment |
|---|---|---|---|---|---|---|---|
| |
CVplot.png | r1 | manage | 90.3 K | 2018-06-25 - 07:50 | AtlasjSilicon | |
| |
solveCV.png | r1 | manage | 77.7 K | 2018-06-24 - 15:13 | AtlasjSilicon |
Topic revision: r3 - 2018-06-26 - AtlasjSilicon

Ideas, requests, problems regarding TWiki? Send feedback