基板カッターの使い方
1.Gerber fileを用意する. 表と裏のGNDを繋げる or not (NPTH/PTH) だけど,基板カッターだと繋げるのは無理. でも基本的にgerber file選択時にはPTHを選択. 2.Desktop上のsoftware: Circuit Pro 1.4をダブルクリック.->基板カッターが動き出す 動き出さない時はusb外れてるかも.machine->E33->connectで繋げる. 3.左魔法の杖2って書いてあるstart process planning wizard->single side(bottom or top)/double side選択後->Next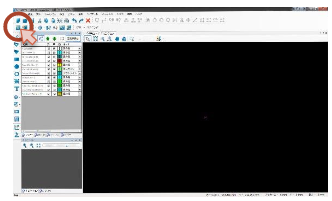 4.基板の種類はFR4/FR5を選択->Next->確認->Done
5.左から2つ目import data from a non naitive format->LPKF_tempdir
4.基板の種類はFR4/FR5を選択->Next->確認->Done
5.左から2つ目import data from a non naitive format->LPKF_tempdir
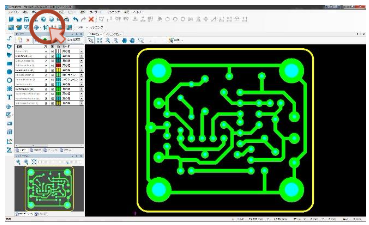
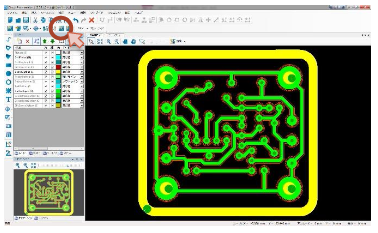
 copper signal top/bottom, mechanical 1(外枠), PTH drill(裏表GND繋げる)を選択してLPKF_tempdirにコピー.
->4つを選択したまま開く.4つ別々に構造のチェックもできる.
6.左のlistにある各項目は読み込んだ4つ以外全てcheckを外す.
7.Signal top/bottomはちゃんと選択する
Tech->wiringを選択
Phase->milling top(top)/milling bottom(bottom)
8.mechanical 1, PTH drillはunknown, undefinedのまま.
9.左から3/4番目無視!!!!!
10.左から5番目.insulate
copper signal top/bottom, mechanical 1(外枠), PTH drill(裏表GND繋げる)を選択してLPKF_tempdirにコピー.
->4つを選択したまま開く.4つ別々に構造のチェックもできる.
6.左のlistにある各項目は読み込んだ4つ以外全てcheckを外す.
7.Signal top/bottomはちゃんと選択する
Tech->wiringを選択
Phase->milling top(top)/milling bottom(bottom)
8.mechanical 1, PTH drillはunknown, undefinedのまま.
9.左から3/4番目無視!!!!!
10.左から5番目.insulate
 wire周りどれくらい掘って独立させますか?の選択->2/4を選択.程よいやつ.
show detailを見てsource->wiringにしたやつはそれにするよ.primary->0.1/0.2全てdefaultのまま.
contour routing->1/6全て切るやつ.show detail source ->mechanical1に選択!toolはdefault0.2のまま.
convert toolpath->たまに出てこないが,drillingが1番目と3番目に出ているはず.
1番目でshow detailを押してsourceをPTH選択!toolはautomatically assignedのdefaultのまま.
3番目でshow detailを押してsourceをPTH選択!toolはautomatically assigned選択!
よくは分からないがこう設定するとうまく行く.
11.start! errorが出なければOK! successfully created for layers->保存してもしなくても良くclose!
12.左から7番目で掘り始める!!!
wire周りどれくらい掘って独立させますか?の選択->2/4を選択.程よいやつ.
show detailを見てsource->wiringにしたやつはそれにするよ.primary->0.1/0.2全てdefaultのまま.
contour routing->1/6全て切るやつ.show detail source ->mechanical1に選択!toolはdefault0.2のまま.
convert toolpath->たまに出てこないが,drillingが1番目と3番目に出ているはず.
1番目でshow detailを押してsourceをPTH選択!toolはautomatically assignedのdefaultのまま.
3番目でshow detailを押してsourceをPTH選択!toolはautomatically assigned選択!
よくは分からないがこう設定するとうまく行く.
11.start! errorが出なければOK! successfully created for layers->保存してもしなくても良くclose!
12.左から7番目で掘り始める!!!
 因みに左から6番目はどうしてもtoolを変えたいときに使用.
ここからは基本的にguideに従う.
13.銅板セット.基本的にボコボコしてなければ大丈夫だが,針を折らない様に一応テープでも固定する!
14.ノズルは掃除機にセットされていて,基板カッター左側にセットする.
15.material setting
application->PCB, FR4/35/1.55...基本defaultで大丈夫.大事なのはlocation.
基板が見えているところで右上左下をセット.領域内に入る感じにセットする.set centerで位置確認.->continue
入っていなければabortでやり直す.
因みに領域内にテープがあると高さを誤認識し,掘りが足らなくなるので注意.
16.toolを変更してください.
drill->wiring top->wiring bottom->mechanicalの順で掘っていきます.
17.掘り出したら必ず掃除機ON!
細さ1.0mmの場合はspiralとcontourで針を変える.contourの時にspiral用(緑色)を使用すると折れるので注意.
細さ2.0mmの場合はspiralとcontourで針を変える様に言われるが変更しない.
18.drill終了後,wireを掘る.
いきなり掘る前に,miling widthを選択し,mill a lineで試し堀り!大丈夫そうならaccept width.
19.掘っている途中に溝が浅いと気付いたら,abortでstopで,operate(段階を選べる)に切り替え.
--
因みに左から6番目はどうしてもtoolを変えたいときに使用.
ここからは基本的にguideに従う.
13.銅板セット.基本的にボコボコしてなければ大丈夫だが,針を折らない様に一応テープでも固定する!
14.ノズルは掃除機にセットされていて,基板カッター左側にセットする.
15.material setting
application->PCB, FR4/35/1.55...基本defaultで大丈夫.大事なのはlocation.
基板が見えているところで右上左下をセット.領域内に入る感じにセットする.set centerで位置確認.->continue
入っていなければabortでやり直す.
因みに領域内にテープがあると高さを誤認識し,掘りが足らなくなるので注意.
16.toolを変更してください.
drill->wiring top->wiring bottom->mechanicalの順で掘っていきます.
17.掘り出したら必ず掃除機ON!
細さ1.0mmの場合はspiralとcontourで針を変える.contourの時にspiral用(緑色)を使用すると折れるので注意.
細さ2.0mmの場合はspiralとcontourで針を変える様に言われるが変更しない.
18.drill終了後,wireを掘る.
いきなり掘る前に,miling widthを選択し,mill a lineで試し堀り!大丈夫そうならaccept width.
19.掘っている途中に溝が浅いと気付いたら,abortでstopで,operate(段階を選べる)に切り替え.
-- Comments


| I | Attachment | History | Action | Size | Date | Who | Comment |
|---|---|---|---|---|---|---|---|
| |
ScreenShot_1.png | r1 | manage | 33.7 K | 2018-04-05 - 09:06 | AtlasjSilicon | |
| |
ScreenShot_2.png | r1 | manage | 33.4 K | 2018-04-05 - 09:06 | AtlasjSilicon | |
| |
ScreenShot_3.png | r1 | manage | 90.0 K | 2018-04-05 - 09:06 | AtlasjSilicon | |
| |
ScreenShot_4.png | r1 | manage | 99.2 K | 2018-04-05 - 09:06 | AtlasjSilicon |
Topic revision: r3 - 2018-04-05 - AtlasjSilicon

Ideas, requests, problems regarding TWiki? Send feedback