HSIO2 Instruction
Useful links
- https://twiki.cern.ch/twiki/bin/viewauth/Atlas/RCEDevelopmentLab

- https://twiki.cern.ch/twiki/bin/view/Atlas/RCEGen3Development
- https://twiki.cern.ch/twiki/bin/view/Atlas/RCEGen3PixelApplication
- http://rceprojectportal.web.cern.ch/RceProjectPortal/forum/index.php
- http://rceprojectportal.web.cern.ch/RceProjectPortal/forum/index.php
- http://www.slac.stanford.edu/~kocian/
- HsioCosmic_00000003.bit
Hardware and Software setup
Artix7にFirmwareを焼く
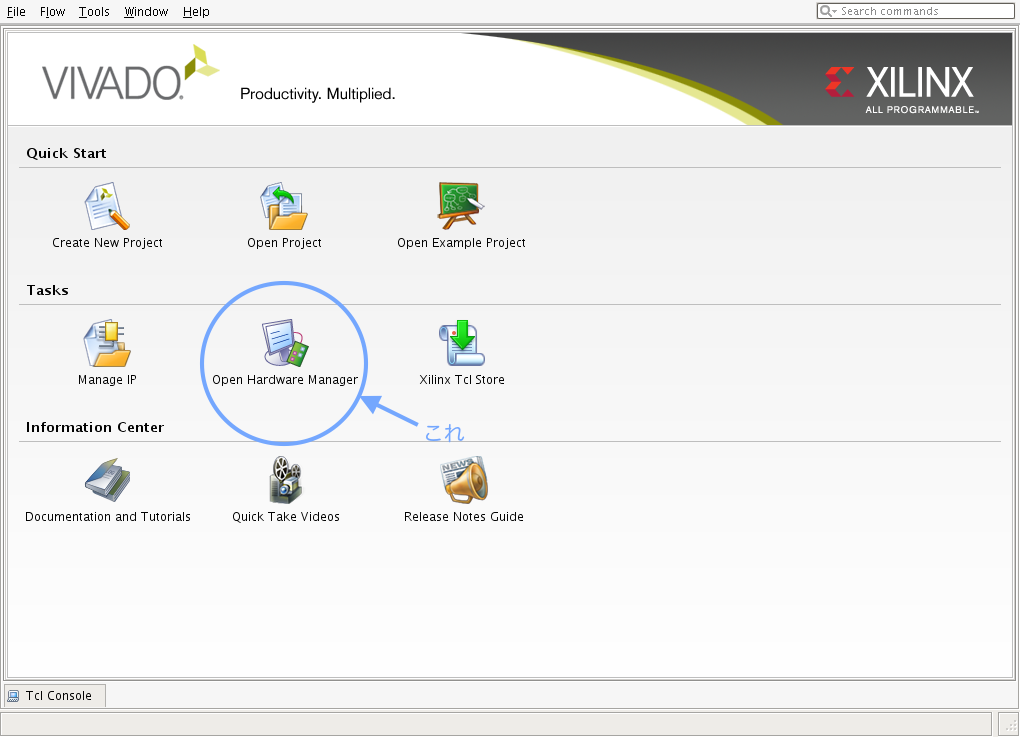
1. 新しいターミナルで: bash> source /opt/Xilinx/Vivado/2015.4/settings64.sh bash> vivado & 2. Open Hardware Managerを開く
3.
open target -> auto connect
だめだったら、open target -> ~ connectで選択
4.
Open Hardware Managerを開く
3.
open target -> auto connect
だめだったら、open target -> ~ connectで選択
4.
 xc7a200t_0(1)を右クリック -> Program Device... ->
Bitstream file: /home/atlasj/Dropbox/SiliconMemo/memo/HSIO2/HsioCosmic_00000003.bit
-> Program
5. caliserver&calibGuiを立ち上げ直して確認
※電源を落とすとFPGAに書き込んだものは失われてしまう. FPGA & memoryに書き込む必要有.
xc7a200t_0(1)を右クリック -> Program Device... ->
Bitstream file: /home/atlasj/Dropbox/SiliconMemo/memo/HSIO2/HsioCosmic_00000003.bit
-> Program
5. caliserver&calibGuiを立ち上げ直して確認
※電源を落とすとFPGAに書き込んだものは失われてしまう. FPGA & memoryに書き込む必要有.
Tuning & Source scan
CalibGuiの立ち上げ方
Running calibserver on the RCE:bash> ssh rce0 -l root
root> source setup.sh
root> calibserver &
On the linux host:
bash> source ~/daq/rce/scripts/setup-gen3.sh
bash> calibGui &
Hardware connection & software setup
Config file template
Tips
- リセット方法
-> HSIO-IIにあるボタン(SOFT RST, COLD BOOT, DTM BOOTの三段階)
EUTelescope Integration
--

| I | Attachment | History | Action | Size | Date | Who | Comment |
|---|---|---|---|---|---|---|---|
| |
vivado_start_.png | r1 | manage | 132.9 K | 2016-03-31 - 08:14 | HiromiSawai | |
| |
vivado_start_0.png | r1 | manage | 153.3 K | 2016-03-31 - 08:58 | HiromiSawai | |
| |
vivado_start_copy.png | r1 | manage | 132.9 K | 2016-03-31 - 08:15 | HiromiSawai |
Topic revision: r4 - 2016-03-31 - HiromiSawai

Ideas, requests, problems regarding TWiki? Send feedback