Difference: PixelCVSimulation (6 vs. 7)
Revision 72018-06-27 - AtlasjSilicon
CV simulationArticle text. -- | ||||||||
| Changed: | ||||||||
| < < | mkdir Pixel/CV | |||||||
| > > | swb上でNew projectの作成。ここでは名前をCVとする。 cd Pixel/CV | |||||||
| Deleted: | ||||||||
| < < | cd Pixel/CV | |||||||
sdeの中身はIVシミュレーションの時と同じもの。
cp /home/yunakamu/work/Sentaurus/tutorial/CV/sde_dvs.cmd .
sdevice
cp /home/yunakamu/work/Sentaurus/tutorial/CV/sdevice_dvs.cmd .
mkdir plot
IV測定の時と同じように走らせたいrunを選択し、走っている人を選択。橙色になったら完了。 完了したセルを選択し、目をクリックし、svisualを起動。 この時選択するのは "n4-ac-des.plot"となっているplot。 V(b)をx軸、C(b,b)を縦軸に選択する。するとセンサー厚さ方向のCV測定シミュレーション結果が得られる。 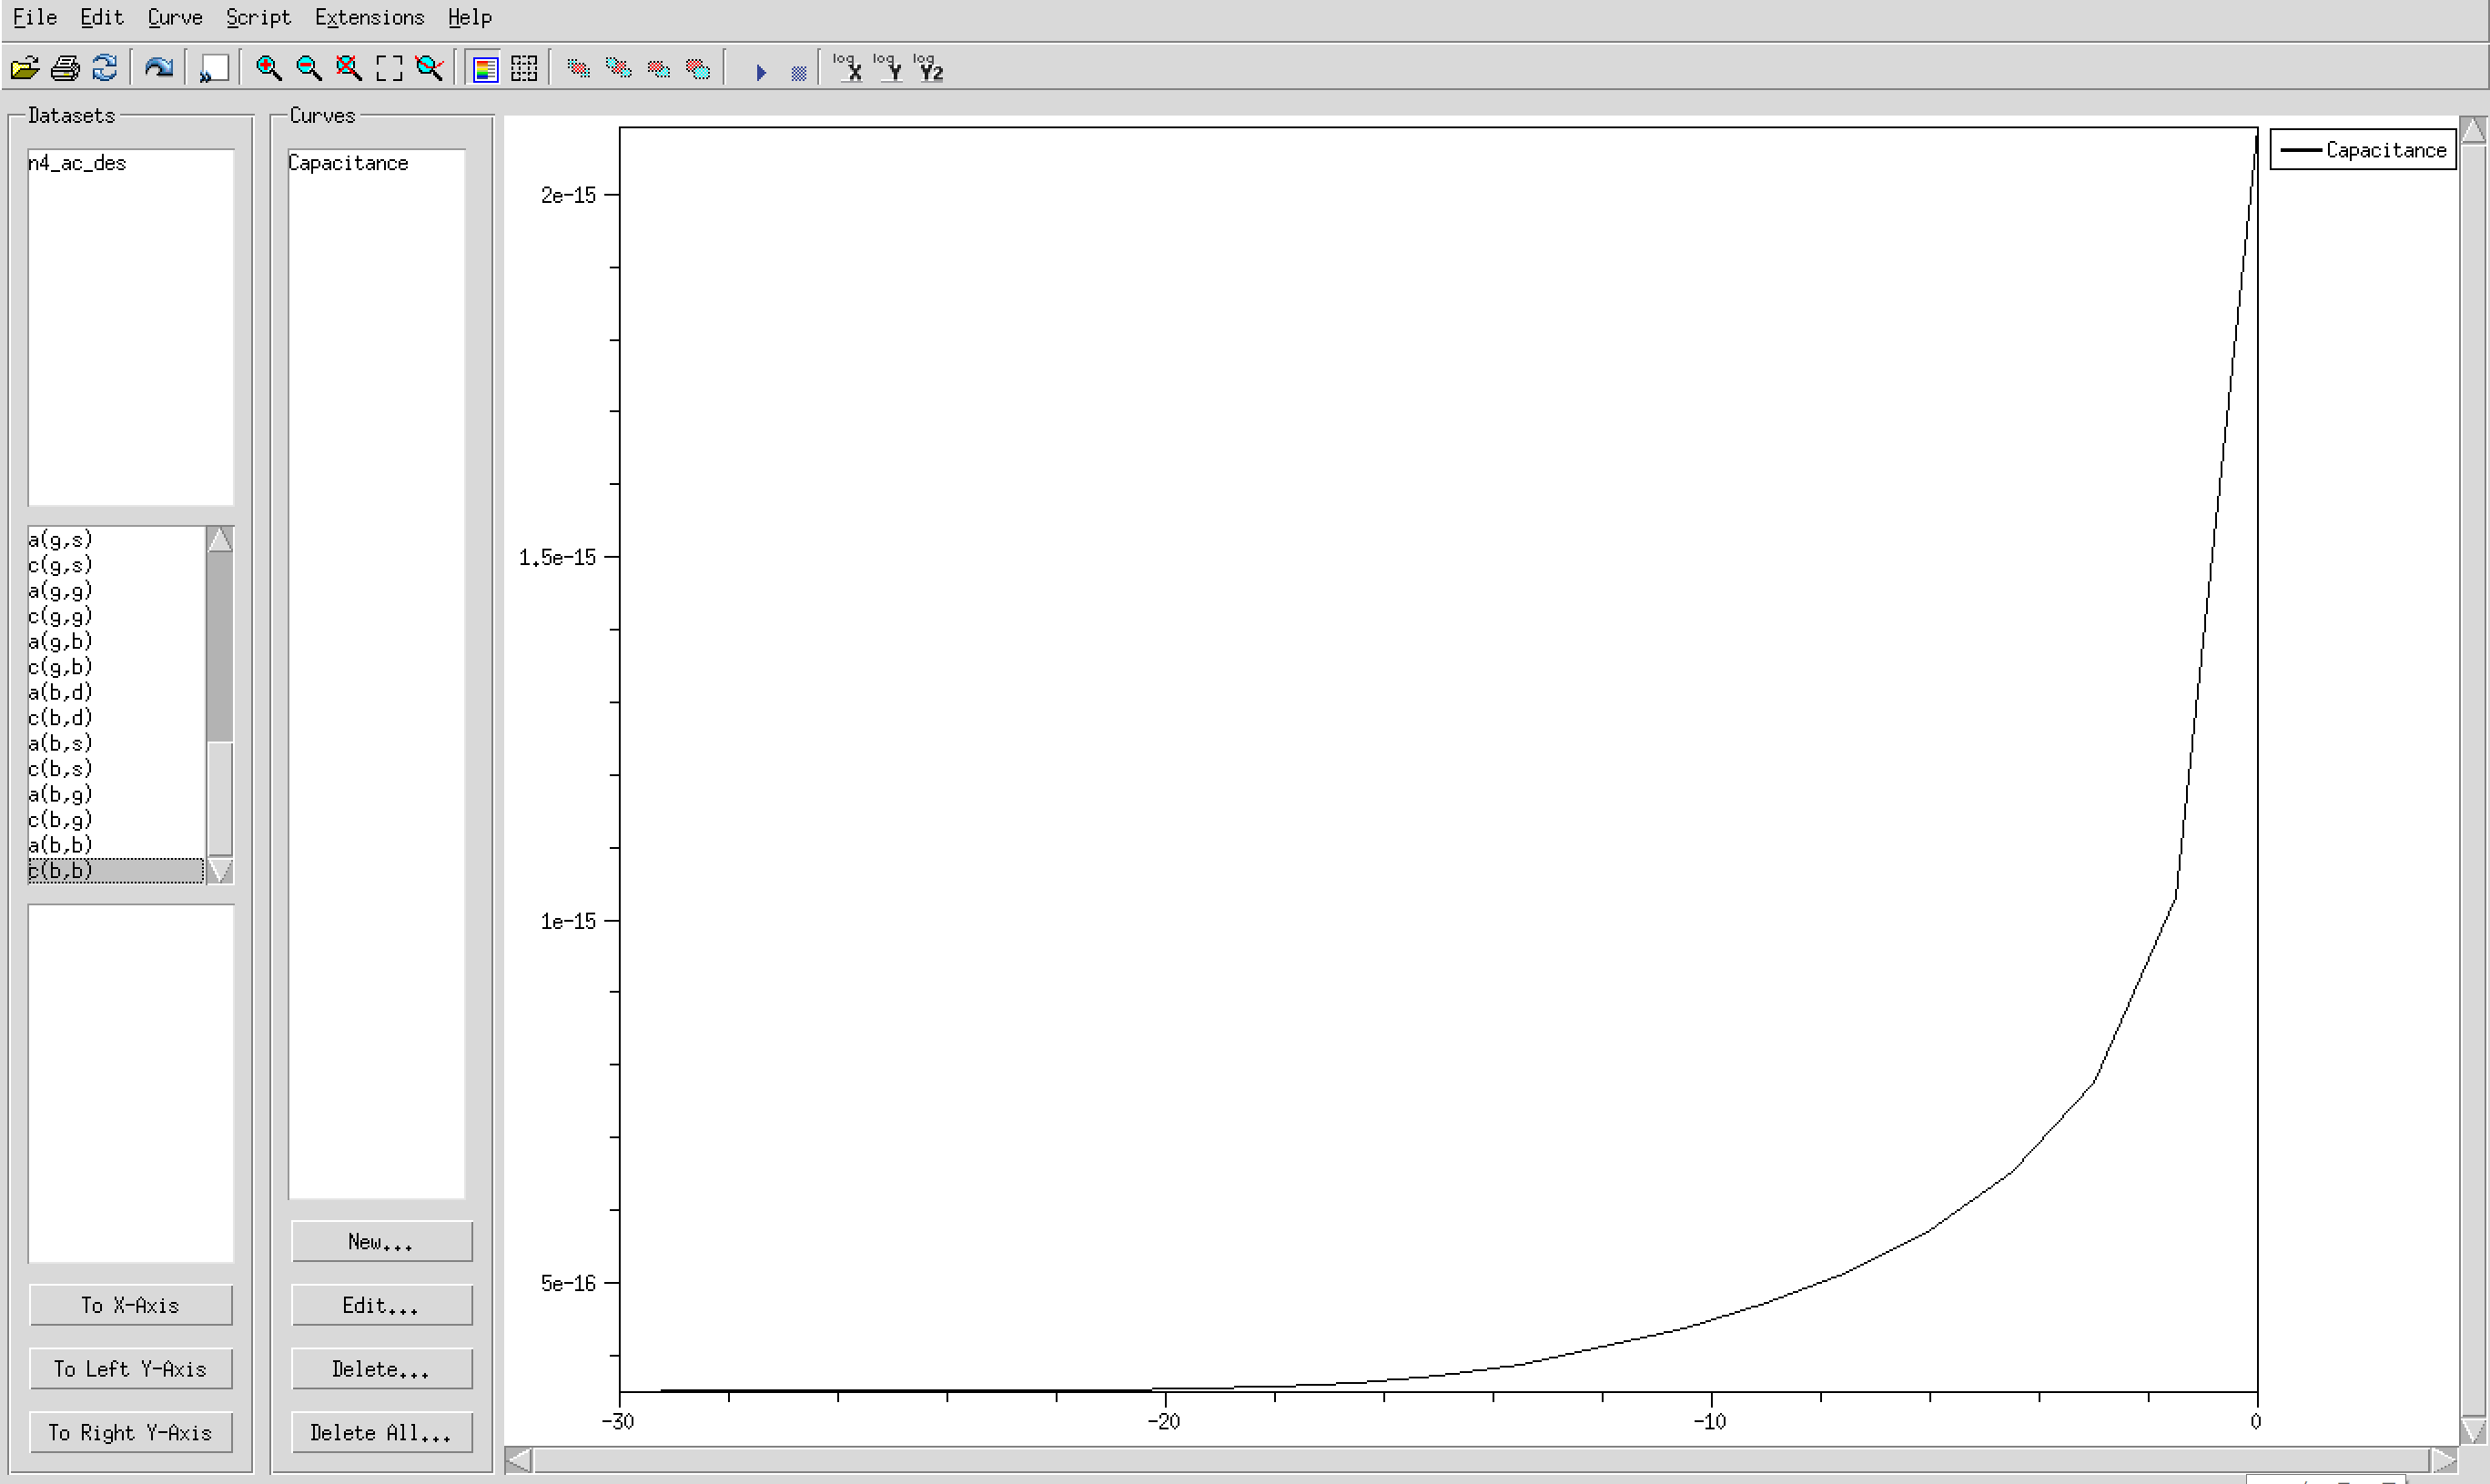 プログラム
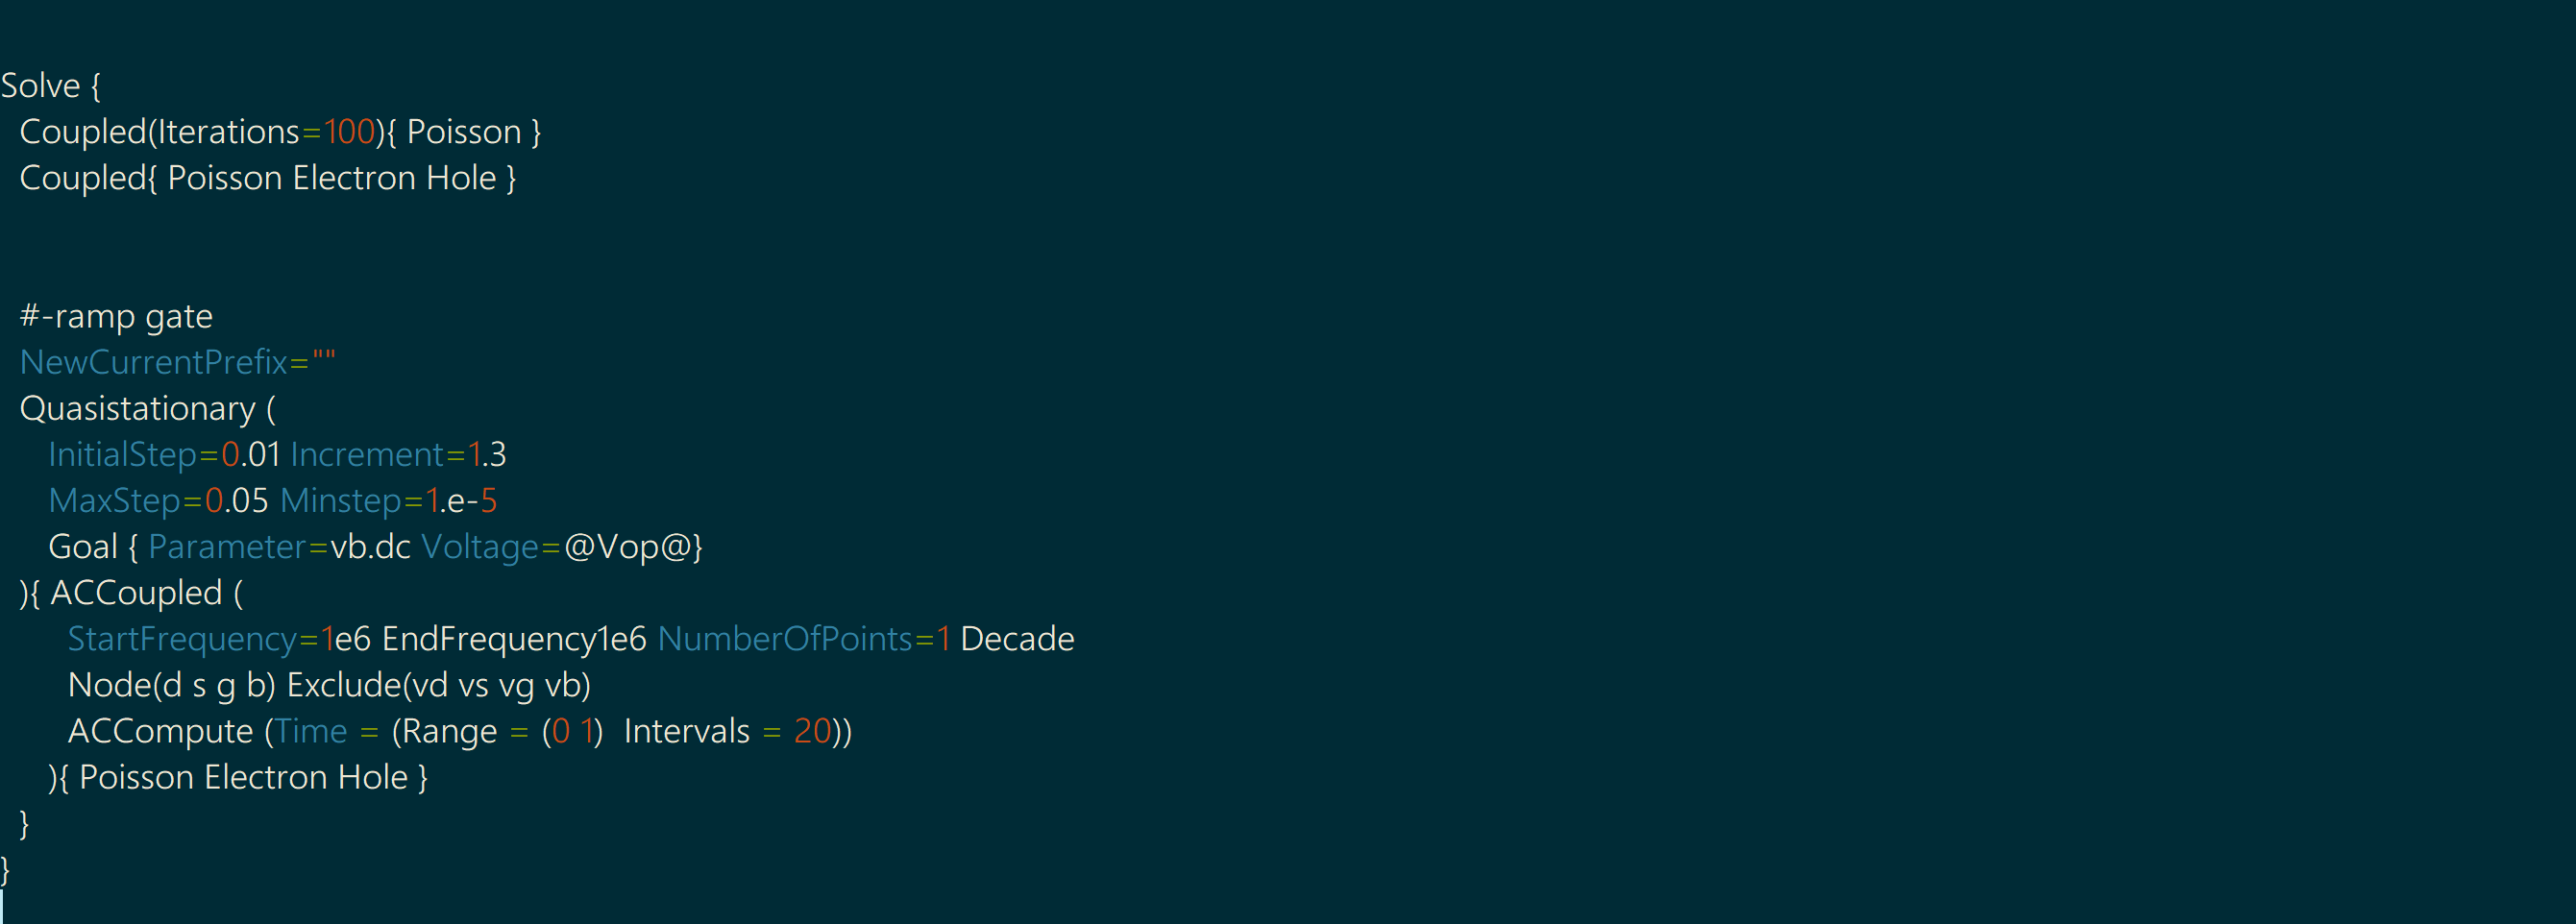
solveの中身がIVものとは異なる。
周波数の指定ができるため、行いたい点を指定。今回は一点。(1e6[Hz])
Node及びExcludeではsystemで指定した電極、及び電圧の変数を入力する。
プログラム
solveの中身がIVものとは異なる。
周波数の指定ができるため、行いたい点を指定。今回は一点。(1e6[Hz])
Node及びExcludeではsystemで指定した電極、及び電圧の変数を入力する。
Comments
| ||||||||
View topic | History: r8 < r7 < r6 < r5 | More topic actions...
Ideas, requests, problems regarding TWiki? Send feedback