

| I | Attachment | History | Action | Size | Date | Who | Comment |
|---|---|---|---|---|---|---|---|
| |
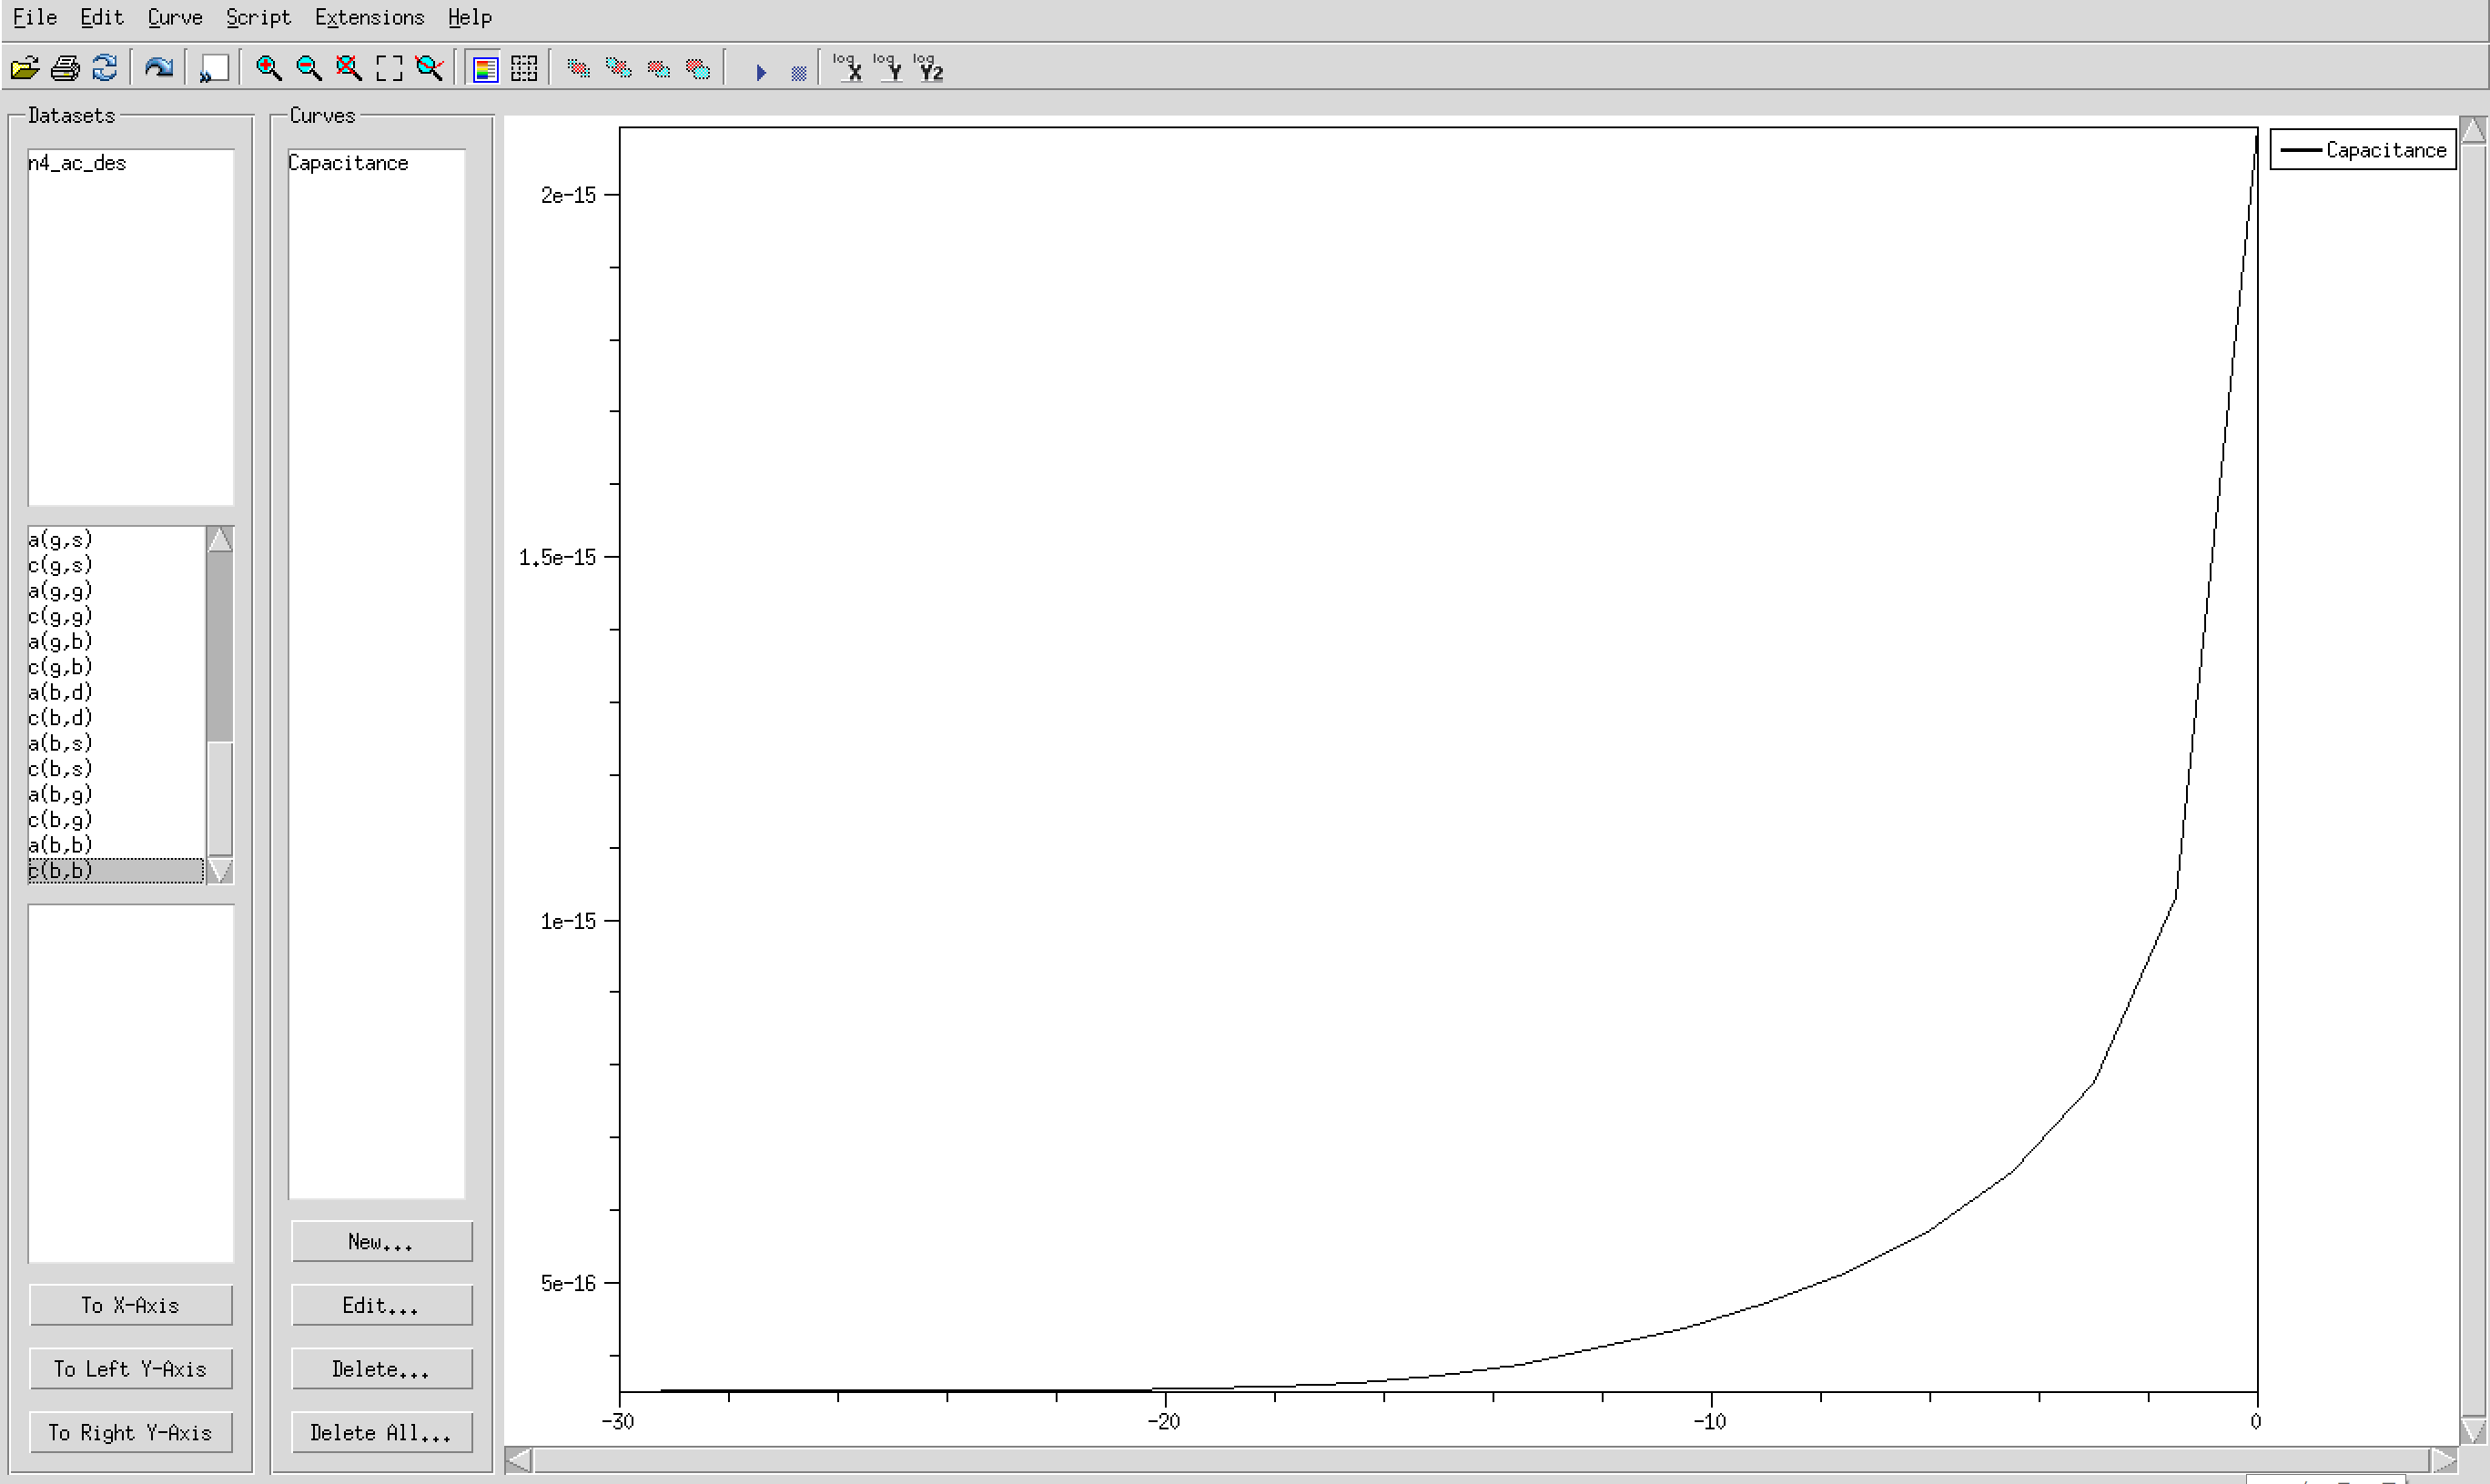
CVplot.png | r1 | manage | 90.3 K | 2018-06-25 - 07:50 | AtlasjSilicon | |
| |
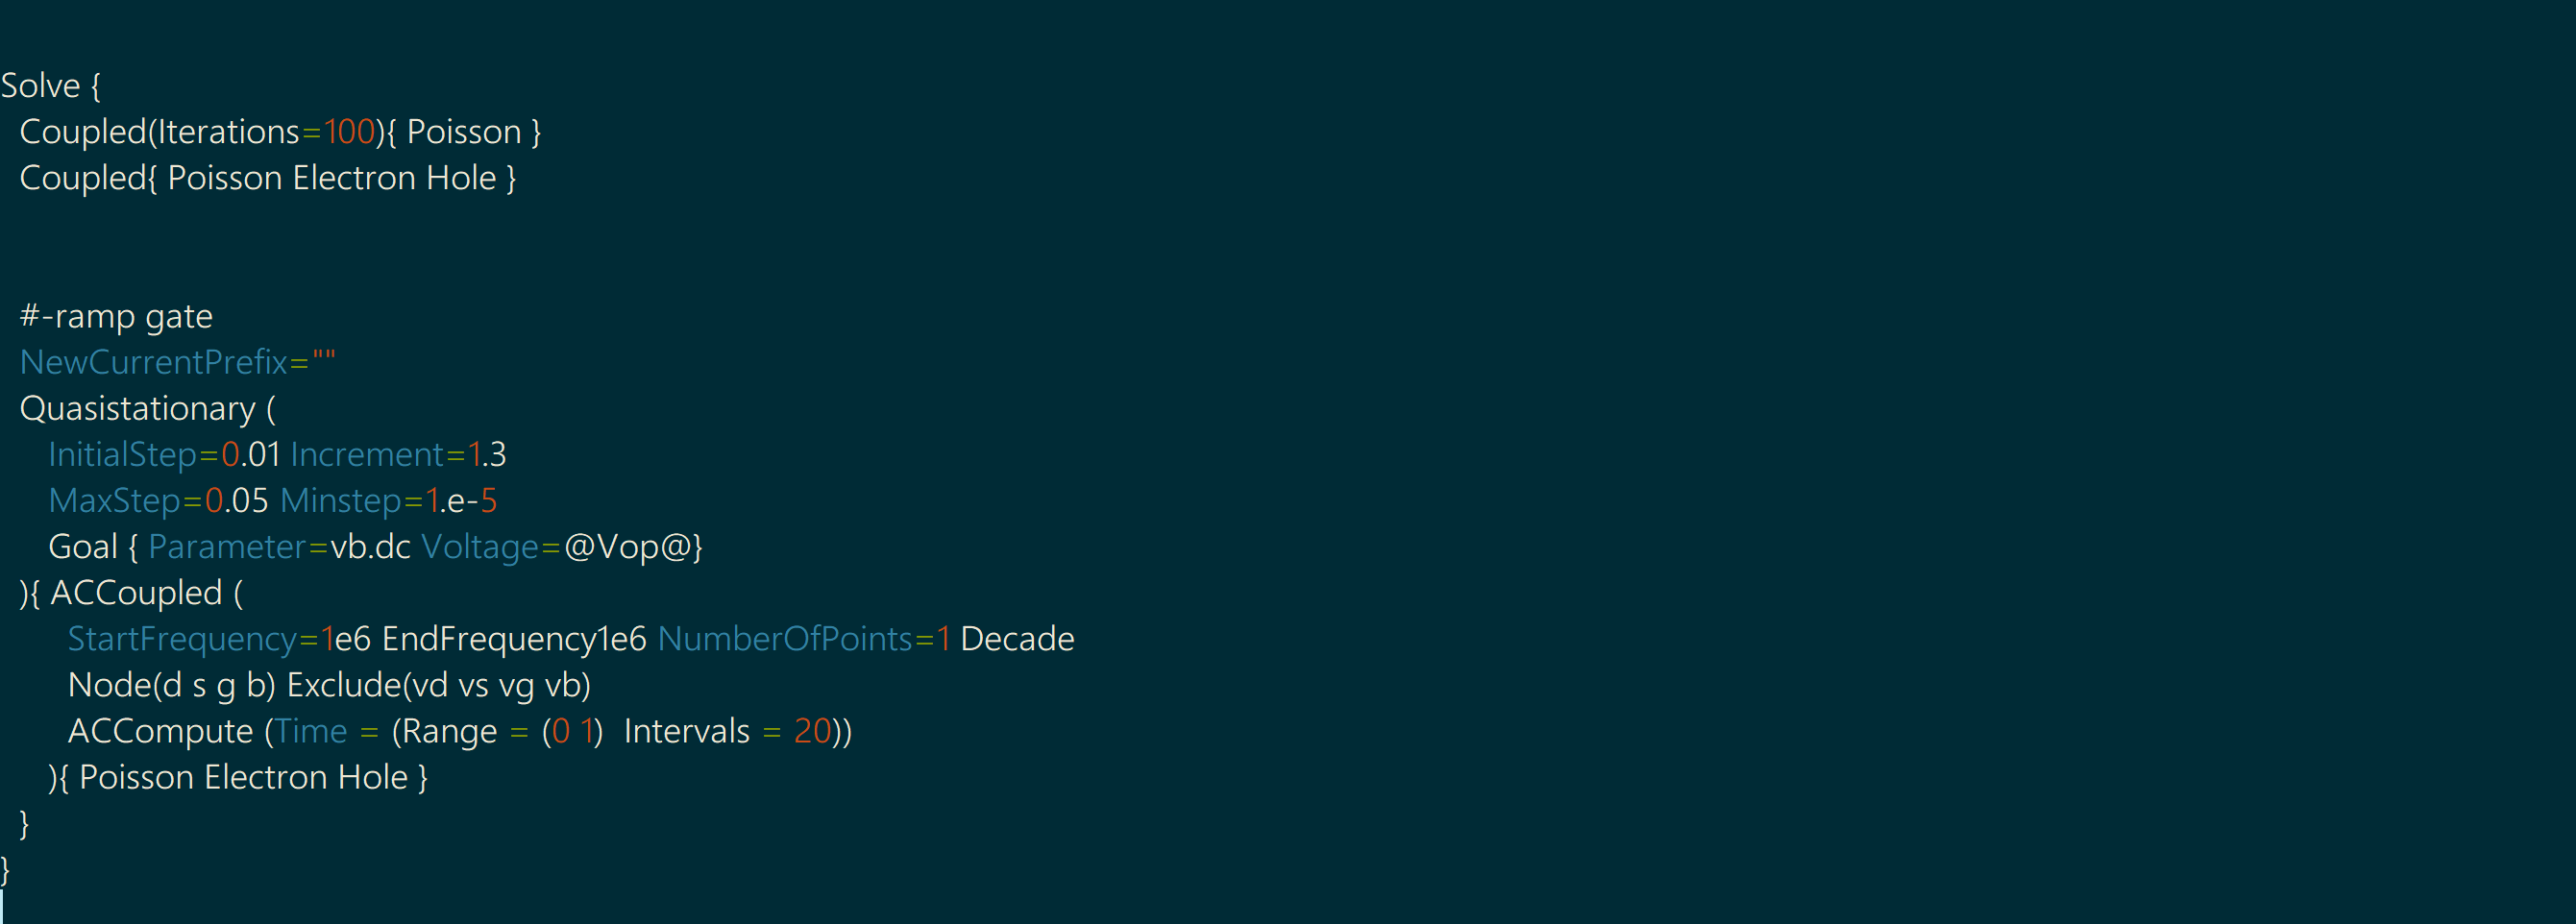
solveCV.png | r1 | manage | 77.7 K | 2018-06-24 - 15:13 | AtlasjSilicon |
This topic: Main > TCADSimulationInformation > Tutorial1stTCADWorkshop > PixelCVSimulation
Topic revision: r8 - 2018-06-27 - AtlasjSilicon
Ideas, requests, problems regarding TWiki? Send feedback